This is the third post in my series on setting up a basic Always On VPN deployment. In this post I will be covering the configuration of the VPN server and the NPS server. I will also talk about the network and firewall configuration. Links to each individual post in this series can be found below.
Always On VPN - Basic Deployment Guide
Always On VPN - Certificates and Active Directory
Always On VPN - User Tunnel
Always On VPN - Device Tunnel
Always On VPN - Troubleshooting
The VPN Server
In this deployment, the role of the VPN server will be filled by Windows Server 2019 running the Routing and Remote Access Server role. This post will provide instructions for both domain-joined and non-domain-joined VPN servers. For the best security, the recommendation is to not join the VPN server to the internal AD domain.
Network Placement
The server will be located in a perimeter network. If a perimeter network or DMZ is not available, the server could be placed on a separate VLAN where access to the rest of the corporate network is controlled by ACLs. The server could also be placed directly on the corporate network, but this is the least secure option.
Network Configuration
The server will have 2 network adapters, 1 internet facing adapter and 1 intranet facing adapter.
External Adapter
Assigned a static IP Address and Gateway IP
Only the IPv4 and IPv6 protocols should be enabled
Internal Adapter
- Assigned a static IP Address
Additional Notes
- The IP addresses assigned to the adapters must be from different subnets
- The gateway IP should only be configured on the external adapter
- Access to internal resources should be configured using static routes
#Create a new static route
New-NetRoute -AddressFamily IPv4 -DestinationPrefix 10.0.0.0/8 -InterfaceAlias 'Internal' -NextHop 192.168.1.254

#View existing static routes
Get-NetRoute -InterfaceAlias 'Internal'
- If the VPN server is domain-joined, the DNS servers should be specified on the internal adapter
- While this guide assumes a dual-interface configuration, it is possible to configure the VPN server with a single network interface. For more information about network interface configuration on the VPN server, refer to this post.
Firewall Configuration
- Traffic allowed from the internet facing firewall to the external network adapter of the VPN server
- If using IKEv2
- UDP 500 (IKE)
- UDP 4500 (IPSec NAT Traversal)
- If using SSTP
- TCP 443 (SSL)
- If using IKEv2
- Traffic allowed to and from the internal network adapter of the VPN server to the internal network
- UDP 1812 (RADIUS Authentication)
- UDP 1813 (RADIUS Accounting)
- RADIUS traffic can also use UDP 1645 and UDP 1646, however, these are legacy ports and should not be needed when using modern clients and servers
If the VPN server is domain-joined, the server will need to be able to communicate with a domain controller. If there is not a read-only domain controller in the perimeter network, then these ports will need to be opened to domain controller on the internal network. Note that this is a potential security risk.
- TCP and UDP 53 (DNS)
- TCP and UDP 88 (Kerberos)
- TCP 135 (RPC Endpoint Mapper)
- TCP and UDP 389 (LDAP)
- TCP 445 (SMB)
- TCP 636 (LDAPS)
- TCP 3268 (LDAP GC)
- TCP 3269 (LDAPS GC)
Feature Installation and Configuration
These steps will walk through the installation and configuration of the Routing and Remote Access Server role. These steps should be preformed on the VPN server.
- Open an administrative PowerShell window and run this command to install the Routing and Remote Access Server role
Install-WindowsFeature DirectAccess-VPN -IncludeManagementTools
- Open the Server Manager and click Open the Getting Started Wizard
- A refresh of the server manager may be required for the notification to appear
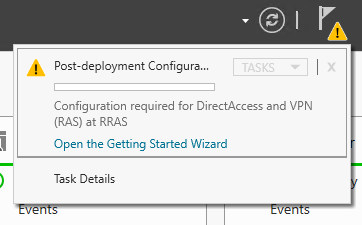
- In the Configure Remote Access window that opens, select Deploy VPN only
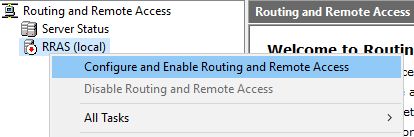
- The Routing and Remote Access console should now be open
- Right click on the VPN server and select Configure and Enable Routing and Remote Access
- The Routing and Remote Access Server Setup Wizard should open
- At the Welcome page, click Next
- Select Custom configuration and click Next
- Select VPN access and click Next
- Click Finish to complete the setup wizard
- When prompted to start the Routing and Remote Access service, click Start service
- If no prompt to start the service appears, right click on the VPN server, select All Tasks, and click Start
- Right click on the VPN server and select Properties
- Security tab
- Change the Authentication provider to RADIUS Authentication and click Configure
- In the window that opens, click Add
- Enter the FQDN of the NPS server
- Enter a shared secret
- This should be a long random string of characters. Save this password somewhere safe. It will be needed again during the NPS server configuration
- Optionally change the time-out or port settings and click OK twice
- Optionally change the Accounting provider
- Change the Authentication provider to RADIUS Authentication and click Configure
- IPv4 tab
- Choose to use DHCP or a static address pool for allocating IP addresses
- If using DHCP, ensure an IP Helper and firewall rules have been created to allow clients to find and communicate with the DHCP server.
- If using a static address pool, ensure the IP addresses have been excluded from being used by the DHCP server
- Set the adapter to the internal network interface
- Choose to use DHCP or a static address pool for allocating IP addresses
- Security tab
- Click OK to close the Properties window
- In the Routing and Remote Access console, right click on Ports and select Properties
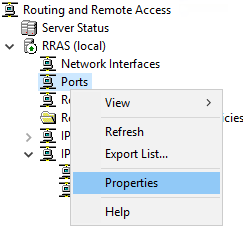
- Select WAN Miniport (IKEv2) and click Configure
- Ensure Remote access connections (inbound only) is checked
- Ensure Demand-dial routing connections (inbound and outbound) is checked
- Optionally modify the maximum ports setting and click OK
- Configure the other unused RAS/Routing ports (L2TP, PPTP, SSTP)
- Uncheck both checkboxes
This concludes the main setup of the Routing and Remote Access role. However, there are additional steps that can be done to improve security as well as add support for device tunnels.
Improve IKEv2 Security
The default security settings for an IKEv2 connection in the Routing and Remote Access configuration are not as good as they could be. The settings used for the IKEv2 connections can be set to a more secure level on the server. If these settings are set on the server, the same settings will need to be configured on the client side before the tunnel will connect.
- Connect to the VPN server and open an administrative PowerShell window
- Run this command to update the IPsec security parameters for IKEv2
Set-VpnServerConfiguration -CustomPolicy -AuthenticationTransformConstants SHA256128 -CipherTransformConstants AES128 -DHGroup Group14 -EncryptionMethod AES128 -IntegrityCheckMethod SHA256 -PFSgroup PFS2048 -SADataSizeForRenegotiationKilobytes 102400
- Restart the Remote Access Management service to allow the changes to take effect
This PowerShell command is sourced from this post.
Enable IKEv2 Fragmentation
It’s possible that the IKEv2 traffic can be split apart if the IP packets are too large. Windows 10 will support IKEv2 fragmentation by default, however this support needs to be manually enabled in Windows Server. Note that this feature only works in Windows Server 1803 and newer. To enable support for IKEv2 fragmentation, run this PowerShell command:
New-ItemProperty -Path "HKLM:\SYSTEM\CurrentControlSet\Services\RemoteAccess\Parameters\Ikev2\" -Name EnableServerFragmentation -PropertyType DWORD -Value 1 -Force
To read more about IKEv2 fragmentation, refer to this post.
Enable Support for Device Tunnels
The default configuration of the Routing and Remote Access server role does not allow machine certificate authentication. If device tunnels will be used, this needs to be enabled.
- Connect to the VPN server and open an administrative PowerShell window
- Run this script to enable machine certificate authentication
- Modify the first line of the script with the common name of the root CA before running the script
$VPNRootCertAuthority = "Common Name of trusted root certification authority"
$RootCACert = (Get-ChildItem -Path cert:LocalMachine\root | Where-Object {$_.Subject -Like "*$VPNRootCertAuthority*" })
Set-VpnAuthProtocol -UserAuthProtocolAccepted Certificate, EAP -RootCertificateNameToAccept $RootCACert -PassThru
This PowerShell script is sourced from this page.
The NPS Server
In this deployment, the role of the NPS server will be filled by Windows Server 2019 running the Network Policy Server role. This server should be domain-joined.
Network Placement and Configuration
The server will be located behind the internal firewall on the internal network. The server should have a single network adapter with a static IP address or a DHCP reservation.
Firewall Configuration
The following ports should be allowed through the internal firewall and the Windows firewall between the VPN server and the NPS server.
- UDP 1812 (RADIUS Authentication)
- UDP 1813 (RADIUS Accounting)
- RADIUS traffic can also use UDP 1645 and UDP 1646, however, these are legacy ports and should not be needed when using modern clients and servers
Windows Server 2019 has a bug where the Windows Firewall rules for the NPS role will appear as active but not actually be working. If communication on these ports does not seem to be making it through the Windows Firewall, open an administrative command prompt and run this command.
sc.exe sidtype IAS unrestricted
For more information about this bug and the solution, see this post.
Feature Installation and Configuration
These steps will walk through the installation and configuration of the Network Policy Server role. These steps should be preformed on the NPS server.
- Open an administrative PowerShell window and run this command to install the Network Policy Server role
Install-WindowsFeature NPAS -IncludeManagementTools
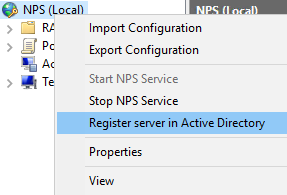
- Open the Network Policy Server console
- Right click on the NPS server and select Register server in Active Directory
- Click OK at the confirmation dialog and again at the success dialog
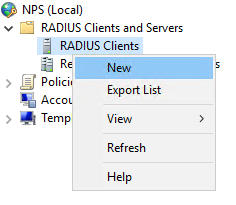
- In the Network Policy Server console, expand RADIUS Clients and Servers
- Right click on RADIUS Clients and select New
- Ensure Enable this RADIUS client is checked
- In the Friendly name box, enter the name of the VPN server
- In the Address (IP or DNS) box, enter the IP address of the internal network interface on the VPN server
- Shared Secret
- Ensure the Manual box is checked
- Enter the Shared Secret that was created during the VPN server setup
- Click OK to close the window
- Select the RADIUS server, ensure RADIUS server for Dial-Up or VPN Connections is selected, and click Configure VPN or Dial-Up
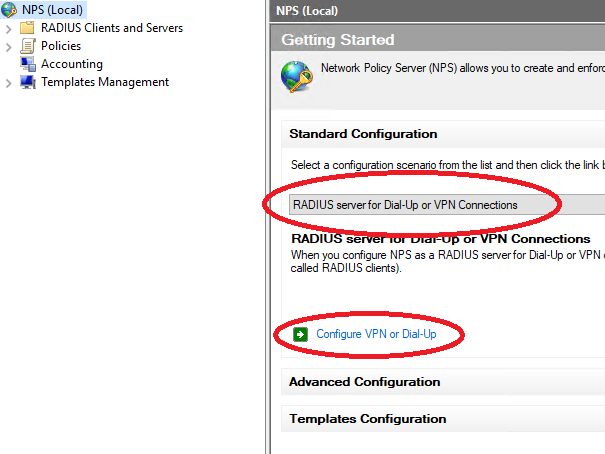
- In the window that appears, select Virtual Private Network (VPN) Connections and click Next
- Select the VPN server and click Next
- On the Authentication Methods page
- Uncheck Microsoft Encrypted Authentication version 2 (MS-CHAPv2)
- Check Extensible Authentication Protocol
- Set the Type to Microsoft: Protected EAP (PEAP)
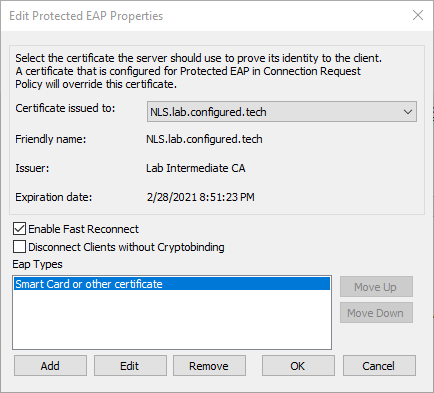
- Click Configure
- Select Secured password (EAP-MSCHAP v2) and click Remove
- Click Add, select Smart Card or other certificate, and click OK
- Click Next
- At the User Groups page
- Click Add and select the AOVPN Users AD group
- Click Next
- At the IP Filters page, click Next
- At the Encryption Settings page, click Next
- At the Realm Name page, click Next
- Click Finish to complete the wizard
This completes the VPN and NPS server configuration portion of the deployment. The next post in the series is Always On VPN - User Tunnel.