This is the second post in my series on setting up a basic Always On VPN deployment. In this post I will be covering the requirements for the Always On VPN certificates. I will also talk about how Active Directory groups can be utilized. Links to each individual post in this series can be found below.
Always On VPN - Basic Deployment Guide
Always On VPN - VPN and NPS Server Configuration
Always On VPN - User Tunnel
Always On VPN - Device Tunnel
Always On VPN - Troubleshooting
Active Directory Groups
There are 4 Active Directory groups that can be created.
AOVPN Users - This group will contain Active Directory user accounts and be used to control which users are allowed to connect via an Always On VPN user tunnel.
AOVPN Computers - This group will contain Active Directory computer accounts and will be used to control which computers receive the Computer certificate.
AOVPN NPS Servers - This group will contain the Active Directory computer objects of the NPS server(s). This group is not required, however it does make the certificate deployment and management process easier.
AOVPN RAS Servers - This group will contain the Active Directory computer objects of the VPN server(s). If your VPN servers are not domain-joined, this group is not required. If your VPN servers are domain-joined this group will make certificate deployment and management easier.
Certificates
There are multiple certificates that can be used in a deployment of Always On VPN. In this example, the certificates will be issued by a Windows Server running Active Directory Certificate Services.
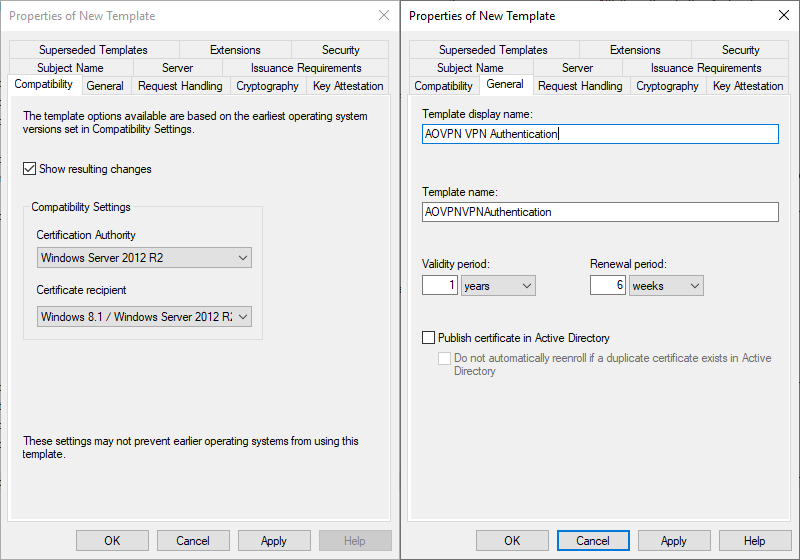
VPN Server Certificate (IKEv2)
This certificate should be issued if the VPN server will be accepting IKEv2 connections.
- Open the Certification Authority MMC snap-in
- Right click on Certificate Templates and select Manage
- Right click on the RAS and IAS Server template and select Duplicate Template
- Compatibility tab
- Set Certification Authority to Windows Server 2012 R2
- Click OK on the Resulting changes dialog box
- Set Certificate recipient to Windows 8.1 / Windows Server 2012 R2
- Click OK on the Resulting changes dialog box
- Set Certification Authority to Windows Server 2012 R2
- General tab
- Enter a display name AOVPN RAS Authentication
- Optionally change the validity and renewal period
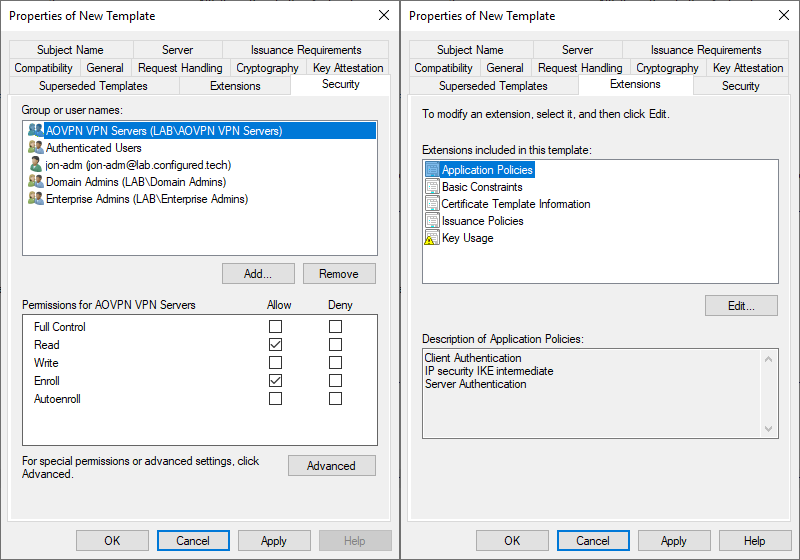
- Security tab
- Add the AOVPN RAS Servers group and grant it Read and Enroll permissions
- Remove the RAS and IAS Servers group
- Extensions tab
- Select Application Policies and click Edit
- Click Add, select IP security IKE intermediate, and click OK
- Select Application Policies and click Edit
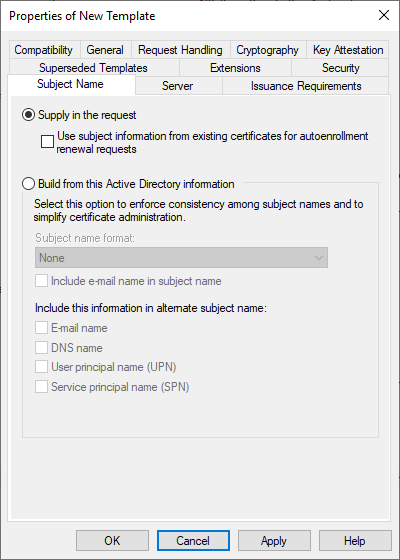
- Subject Name tab
- Check Supply in the request
- Click OK on the Certificate Templates dialog box
- Check Supply in the request
- Click OK to save and close the properties window
- Compatibility tab
VPN Server Certificate (SSTP)
This certificate should be issued if the VPN server will be accepting SSTP connections. The certificate revocation list (CRL) for this certificate needs to be available on the internet. If the CRL for the internal PKI is not publicly available, then this certificate should be issued through a third-party CA. An existing SSL wildcard certificate could be used here. For more information about the VPN server SSTP certificate, see this post.
NPS Server Certificate
- Open the Certification Authority MMC snap-in
- Right click on Certificate Templates and select Manage
- Right click on the RAS and IAS Server template and select Duplicate Template
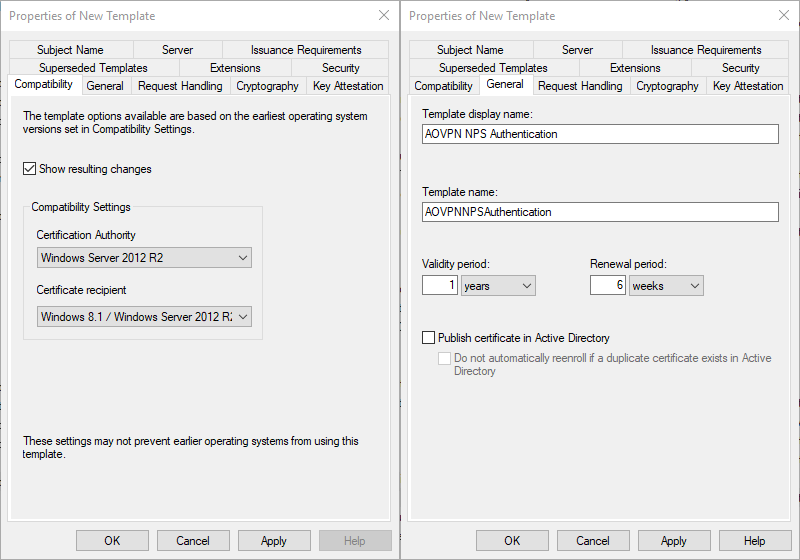
- Compatibility tab
- Set Certification Authority to Windows Server 2012 R2
- Click OK on the Resulting changes dialog box
- Set Certificate recipient to Windows 8.1 / Windows Server 2012 R2
- Click OK on the Resulting changes dialog box
- Set Certification Authority to Windows Server 2012 R2
- General tab
- Enter a display name AOVPN NPS Authentication
- Optionally change the validity and renewal period
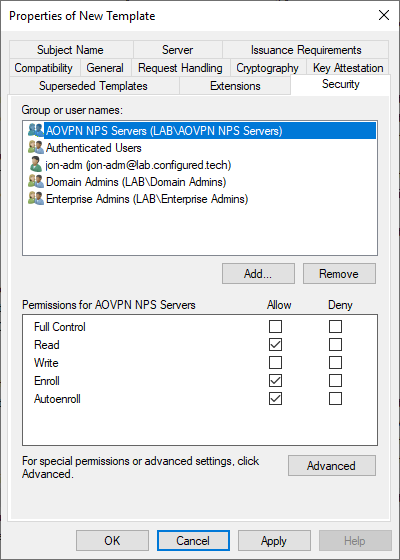
- Security tab
- Add the AOVPN NPS Servers group and grant it Read, Enroll, and Autoenroll permissions
- Remove the RAS and IAS Servers group
- Click OK to save and close the properties window
- Compatibility tab
User Authentication Certificate
- Open the Certification Authority MMC snap-in
- Right click on Certificate Templates and select Manage
- Right click on the User template and select Duplicate Template
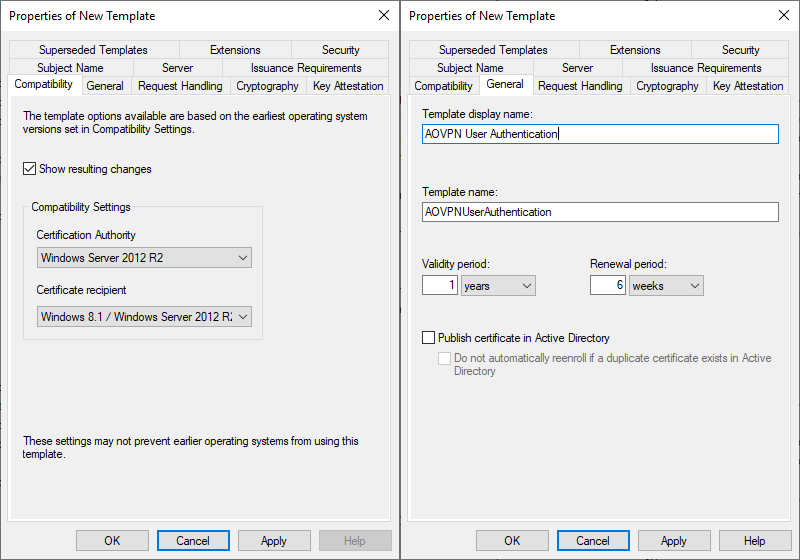
- Compatibility tab
- Set Certification Authority to Windows Server 2012 R2
- Click OK on the Resulting changes dialog box
- Set Certificate recipient to Windows 8.1 / Windows Server 2012 R2
- Click OK on the Resulting changes dialog box
- Set Certification Authority to Windows Server 2012 R2
- General tab
- Enter a display name AOVPN User Authentication
- Uncheck Publish certificate in Active Directory
- Optionally change the validity and renewal period
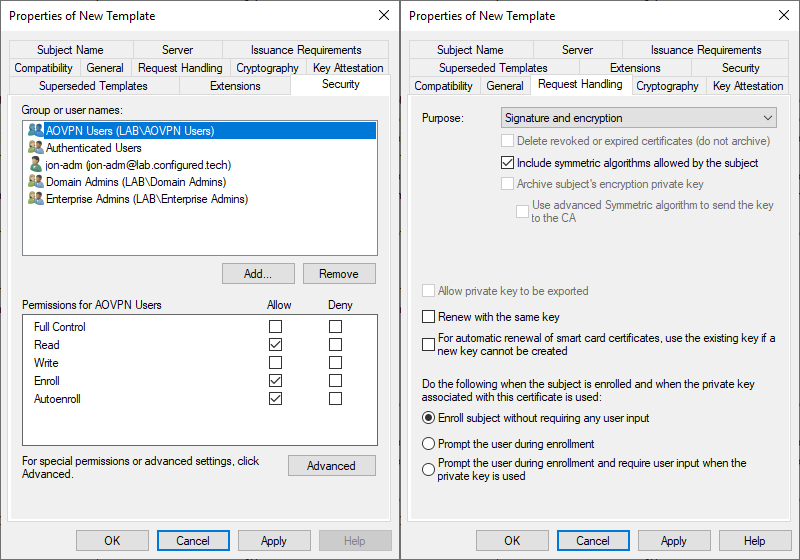
- Security tab
- Add the AOVPN Users group and grant it Read, Enroll, and Autoenroll permissions
- Remove the Domain Users group
- Request Handling tab
- Uncheck Allow private key to be exported
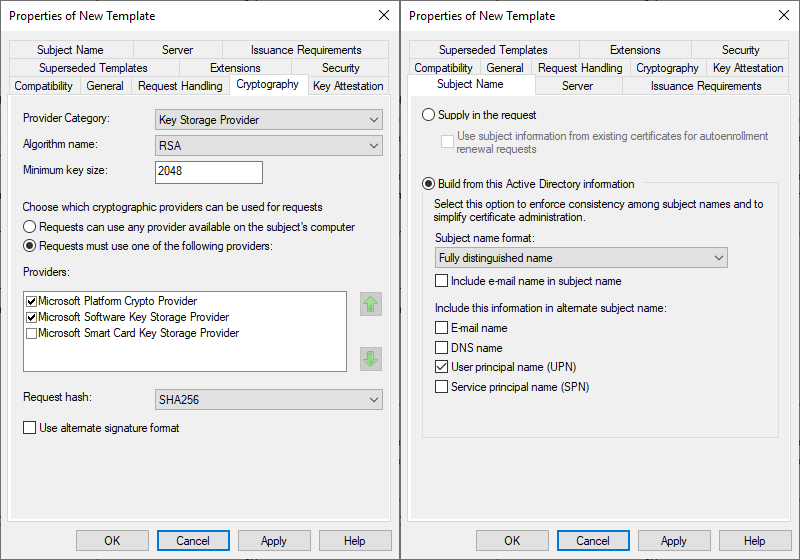
- Cryptography tab
- Change Provider Category to Key Storage Provider
- Check Requests must use one of the following providers
- In the Providers list
- Check Microsoft Platform Crypto Provider and Microsoft Software Key Storage Provider
- Use the up arrow button on to move Microsoft Platform Crypto Provider to the top of the list
- Set the Request hash to SHA256
- Subject Name tab
- Uncheck Include e-mail name in the subject name and E-mail name
- Click OK to save and close the properties window
- Compatibility tab
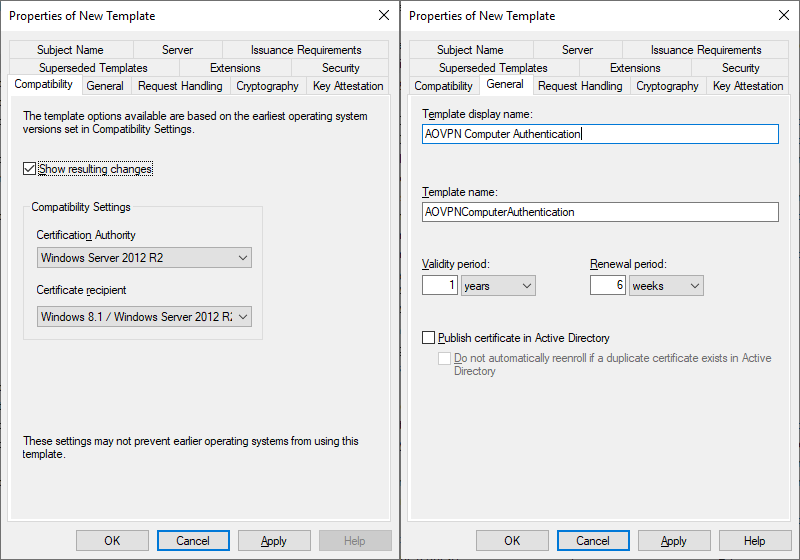
Computer Authentication Certificate
The only requirement for this certificate is that is has the Client Authentication property under Enhanced Key Usage. If a certificate with this property has already been issued to computers for other reasons (wireless, Configuration Manager, etc.) that certificate would work to authenticate the connection.
Open the Certification Authority MMC snap-in
Right click on Certificate Templates and select Manage
Right click on the Computer template and select Duplicate Template
Compatibility tab
- Set Certification Authority to Windows Server 2012 R2
- Click OK on the Resulting changes dialog box
- Set Certificate recipient to Windows 8.1 / Windows Server 2012 R2
- Click OK on the Resulting changes dialog box
- Set Certification Authority to Windows Server 2012 R2
General tab
- Enter a display name AOVPN Computer Authentication
- Optionally change the validity and renewal period
Security tab
- Add the AOVPN Computers group and grant it Read, Enroll, and Autoenroll permissions
- Remove the Domain Computers group
Click OK to save and close the properties window

Issue the Certificates
After all of the certificate templates have been created, the need to be issued.
- Open the Certification Authority MMC snap-in
- Right click on Certificate Templates, hover over New, and select Certificate Template to Issue
- Select the certificates that were just created and click OK
Deploy the Certificates (User, Computer, and NPS Server)
The User, Computer, and NPS Server certificates are all configured to allow auto-enrollment. This means the users and computers can be instructed to install the certificates automatically. This can be done using Group Policy.
- Open the Group Policy Management MMC snap-in
- Create a new Group Policy Object named Enable Certificate Auto-enrollment
- Edit the newly created policy
- Navigate to Computer Configuration > Policies > Windows Settings > Security Settings > Public Key Policies
- Open the properties of Certificate Services Client - Auto-Enrollment
- Set Configuration Model to Enabled
- Check Renew expired certificates and Update certificates
- Open the properties of Certificate Services Client - Auto-Enrollment
- Navigate to User Configuration > Policies > Windows Settings > Security Settings > Public Key Policies
- Open the properties of Certificate Services Client - Auto-Enrollment
- Set Configuration Model to Enabled
- Check Renew expired certificates and Update certificates
- Open the properties of Certificate Services Client - Auto-Enrollment
- Navigate to Computer Configuration > Policies > Windows Settings > Security Settings > Public Key Policies
- Close the Group Policy Management Editor
- Select the newly created Group Policy Object
- Use the Security Filtering feature to limit the policy to apply to AOVPN Users and AOVPN Computers
- Link the Group Policy Object to the organizational unit(s) containing computer and user objects
After the Group Policy Object has been created and deployed, the user, computer, and NPS server certificates should automatically install. Note that you may need to reboot the computers and/or logoff the users before the certificates will appear.
To verify the user certificate is installed, run certmgr.msc and look in the Personal store.
To verify the computer certificate is installed, run certlm.msc and look in the Personal store.
Deploy the VPN Server Certificate
The VPN server certificate requires manual steps to complete the enrollment process. However, these steps are different depending on weather or not the server is Active Directory domain-joined.
Domain-Joined
- Add the VPN server to the AOVPN VPN Servers Active Directory group
- Log into the VPN server and run certlm.msc
- Right click on the Personal store, hover over All Tasks, and select Request New Certificate
- Click Next at the Before You Begin page
- Select Active Directory Enrollment Policy and click Next
- Select the AOVPN VPN Authentication certificate and click the More Information is Required link
- Set the Subject Name type to Common Name
- Enter the external FQDN of the VPN server (aovpn.domain.com) and click Add
- Set the Alternative Name type to DNS
- Enter the external FQDN of the VPN server (aovpn.domain.com) and click Add
- Click OK to close the certificate properties window
- Click Enroll to complete the certificate enrollment
- Set the Subject Name type to Common Name
Non-Domain-Joined
- Log into the VPN server
- Create a new text document and save it as VPNGateway.inf
- Copy this data into the newly created file
- Replace both instances of aovpn.domain.com with the external FQDN of the VPN server
[Version]

Signature="$Windows NT$"

[NewRequest]
Subject = "CN=aovpn.domain.com"
Exportable = FALSE
KeyLength = 2048
KeySpec = 1
KeyUsage = 0xA0
MachineKeySet = True
ProviderName = "Microsoft RSA SChannel Cryptographic Provider"
RequestType = PKCS10

[Extensions]
2.5.29.17 = "{text}"
_continue_ = "dns=aovpn.domain.com&"
- Open an administrative command prompt and run this command to create a new certificate request
Certreq -new VPNGateway.inf VPNGateway.req
- This will create a new file named VPNGateway.req
- Copy VPNGateway.req to the certificate authority (CA) server
- On the CA server, open an administrative command prompt
- Run this command to generate a certificate from the request file
Certreq -attrib "CertificateTemplate:AOVPNVPNAuthentication" -submit VPNGateway.req VPNGateway.cer
- This will create a new file named VPNGateway.cer
- Copy the VPNGateway.cer file back to the VPN server
- On the VPN server, open an administrative command prompt
- Run this command to complete the certificate request
Certreq -accept VPNGateway.cer
If the VPN server is non-domain-joined, it will also need to have the full certificate chain installed so the new cert is properly trusted. This involves exporting the root cert from each tier of the PKI down to the server that issued the VPN certificate. In my example, there is an offline root CA and a domain-joined issuing CA.
- Log into the Root CA and the Issuing CA and run this command from an administrative command prompt
- Replace NameOfServer with the name of the sever the certificate is being exported from
Certutil -ca.cert NameOfServer.cer
- Copy the exported certificates to the VPN server
- Right click on the exported Root CA certificate and click Install Certificate
- Select Local Machine and click Next
- Select Place all certificates in the following store and click Browse
- Select Trusted Root Certification Authorities and click OK
- Click Next
- Click Finish to complete the import
- Right click on the exported Issuing CA certificate and click Install Certificate
- Select Local Machine and click Next
- Select Place all certificates in the following store and click Browse
- Select Intermediate Certification Authorities and click OK
- Click Next
- Click Finish to complete the import
This completes the certificate configuration portion of the deployment. The next post in the series is Always On VPN - VPN and NPS Server Configuration.